1. first look for all the materials and tools you'll need:
* a cheat of PVC that's about 2 mm thick (any color can be used)
* patron paper
* piece of non-fraying fabric big enough to coat both sides of your monofin
* contact-glue like BisonKit
* alcohol marker
* protection for your table
* strong scissors
* old but sharp scissors
* fabric scissors
* old paintbrushes and spatulas
* incenses-sticks
* stretch fabric to make the tail from (best is 4-way-stretch)
* for tail 2: a matching plastic zipper
* cord (longer than the waist)
* special bead like they use with sweaters
* if you like some ribbons, sequences or other fabrics to decorate your tail
* matching sewing threat
2. draw your patron (half of it) for your monofin on the paper and cut it out. draw it again but add 1cm seam-allowens and cut it, this will make the patron for your fluke.
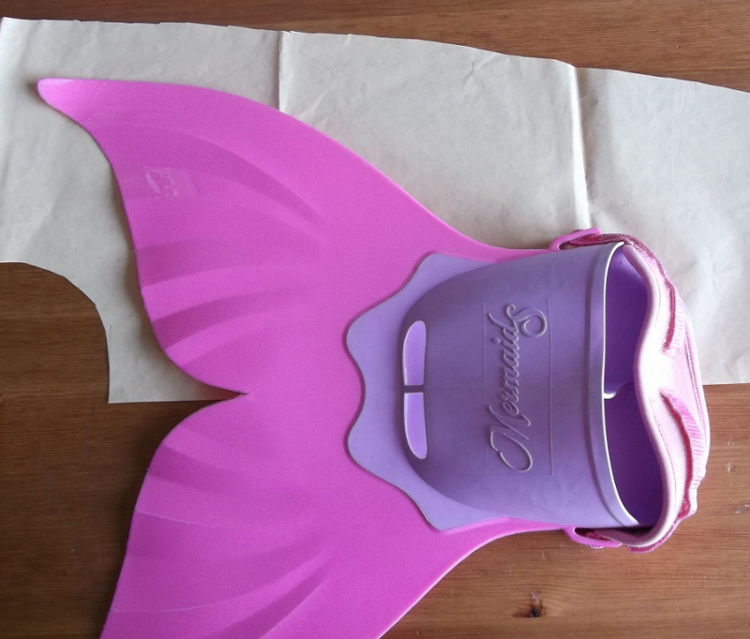


3. put the patron without the seam-allowens onto the PVC-cheat (with the protection-foil still on it on both sides). draw the first half around the paper with the alcohol marker, flip the paper and draw the second half.


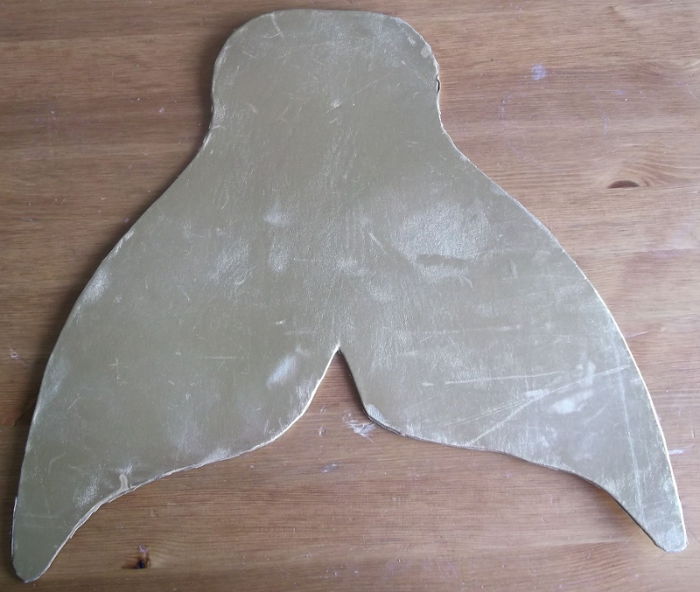
4. cut the shape with the strong scissors and remove the protection-foil from both sides.


5. now we're going to work with the glue, so protect your table. I use 3 silicone baking-cheats that are easy to clean and re-use. now you cover 1 side of the PVC with the glue. spread out very well with 1 of your spatulas. before the glue is totally dry, put a piece of non-fray-fabric (leftover from the tail) over it. smooth it out very well and push it down with your fingers.


6. now you cut (with the old scissors) the edge of the fabric about 2 cm from the edge of the PVC. then give little cuts in the fabric towards the PVC every 2 cm. this way you can easily fold over the fabric to glue it down. to glue it, add some glue to those little tabs and on the edge of the cheat.


7. now to cover up the other side of the monofin. again cover the cheat with the glue and some extra on the edges. put your second piece of non-fray-fabric on top of the glue and smooth out. cut of the excess of the fabric so the edges are nice and smooth. now your 'monofin' is done.


9. cut the patron of the body out of your fabric for the tail. just fold over a little edge for the front-part.


10. also cut the part for your fluke twice out of the fabric and the organza. my organza wasn't wide enough to cut only 2 pieces, so I've cut 4 half flukes. also cut a strip of organza a little lager than the waist if you like hipfins like Ariel's.


11. let's work on the organza for now. protect your table again and take some incenses-sticks (you don't use very much), special plate to hold it and a lighter. light the stick and blow out the flame. run the organza aside the glowing end of the stick at about 1 mm distance to meld the edge of the organza. do this outside or with an open window as it stinks.


12. stitching time now. if your machine has a strait stretch-stitch, then use that. if not, put the settings at a very long and narrow rig-rag-stitch. put the right color of treat onto your machine.


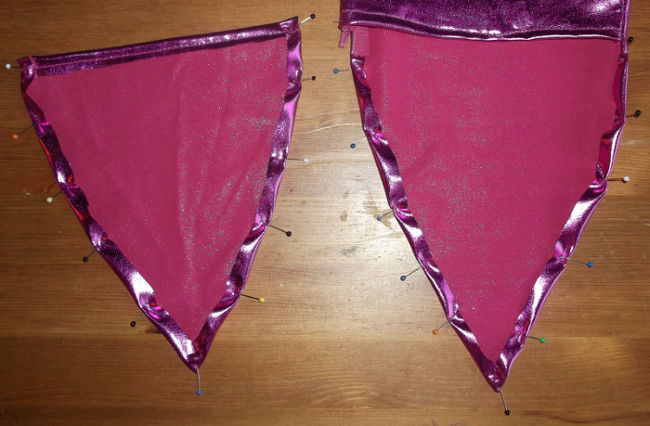
13. pin the 2 fluke-parts, right side in, to each other. also do this with the organza fluke. then sew at 1cm from the edge all around the fluke, leaving to top open.


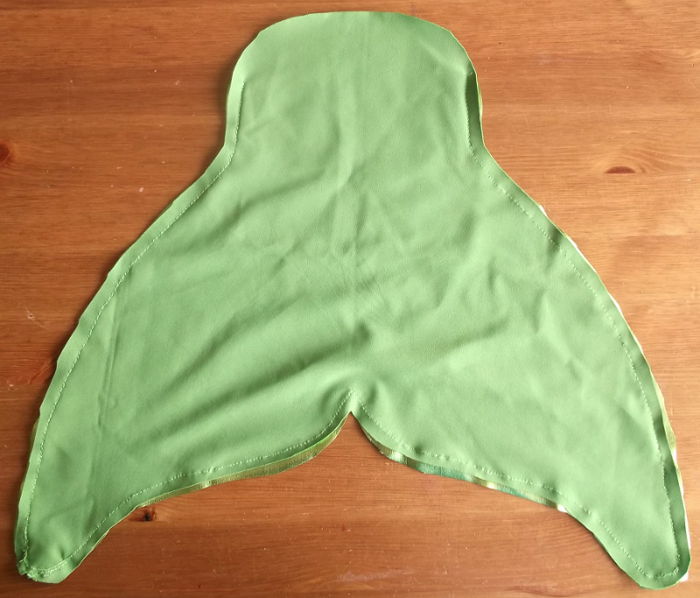

14. cut little slits in the outside of the fabric (not the organza). turn the fluke right-side out and add your monofin.


15. pin the organza-fluke over the fabric one and sew the op by hand. if yours is also 4 parts, then also sew down the end of the fluke, so everything stays nice and together.


16. now to work on the body of your tail. pin the 2 long sides, right side in, together and sew it at 1cm of the edge.

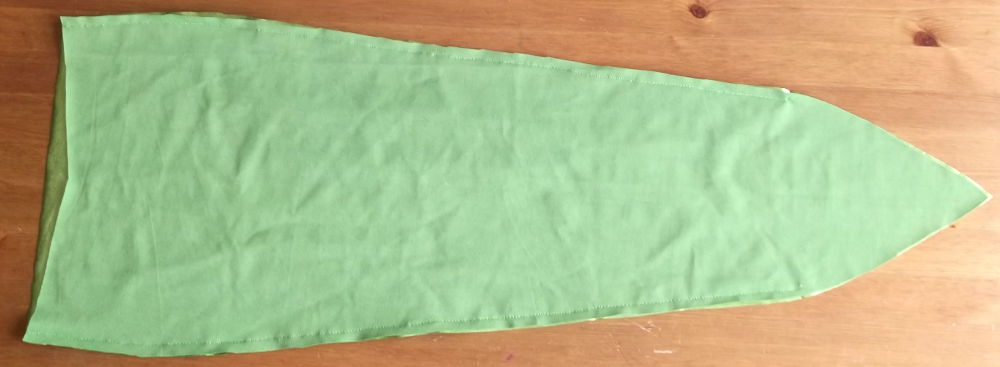
17. fold over the top of the body (waist) about 2 cm to the inside. add 2 loops of ribbon to the side-seams, to hang your tail later when it's done. then sew on the edge of the fabric, but leave 2 cm open at the back.


18. as I like to add a waistfin to my tail, we work on that now. take the long piece of organza and fold it double lengthwise, pin it and sew it at 1 cm from the edge.


19. fold the organza double again so you got a big loop. pin and stitch on 1 cm from the edge.


20. pin this piece on the inside of the waist and sew it while stretch the body-fabric. by doing this the organza will gather and stretch when putting the tail on. also leave about 2 cm open at the same place in the back.


21. gather the front part of the waistfin and sew it down under the waist.

22. now take a special needle or safety-pin, the cord and the special bead. with the use of the needle of safety-pin pull the cord through the tunnel at the waist. then pull your cord through the hole(s) of your bead. make a 8-knot at each end of the cord.


23. now the top is done, let's work on the bottom. fold the edges of both points 1 cm to the inside of the fabric and pin it.

24. pin both points at it's place on the fluke (without pinning the monofin). do this at both side at once. the you hand-sew those edges. you can decorate them if you like by using a ribbon or sequences.


25. to put the tail on easy, sew the fluke on the inside toe the side seams of the body and your tail is done.


26. now we are going to work on the 'dry-tail'. to make the body, you have to draw the patron according the measurements of the child (mine is for a child that is 5 years). add 1cm seam-allowens to the outside of your patron. also take the patron of your fluke.
27. cut the patron of the body out of your fabric for the tail. just fold over a little edge for the front-part. as we need a split at the backside (where the ankles are), we need to cut the back-part in 2 parts.


28. also cut the part for your fluke twice out of the fabric.


29. stitching time now. if your machine has a strait stretch-stitch, then use that. if not, put the settings at a very long and narrow rig-rag-stitch. put the right color of threat onto your machine.
30. pin the 2 fluke-parts, right side in, to each other. then sew at 1cm from the edge all around the fluke, leaving to top open.


31. cut little slits in the outside of the fabric. turn the fluke right-side out and add your monofin.


32. now to work on the body of your tail. fold the 2 short edges of the back-part 1 cm to the inside, pin and sew.

33. pin the 2 long sides, right side in, together. put the zipper at the side where it will be later on. and sew the longest side at 1cm of the edge and the other side until a little past the zipper.


34. now to put the zipper into it's place. to do this we're using a special zipper-piece for your machine and put the needle all to the right. fold the fabric to the inside and pin. pin the zipper in place, with the open side to the fluke. use a contrast threat to hand-sew the zipper in place with a 'big' up-and-down stitch. now you can sew your zipper with your machine and remove the contrast threat.


35. fold over the top of the body (waist) about 2 cm to the inside. add 2 loops of ribbon to the side-seams, to hang your tail later when it's done. then sew on the edge of the fabric, but leave 2 cm open at the back.


36. now take a special needle or safety-pin, the cord and the special bead. with the use of the needle of safety-pin pull the cord through the tunnel at the waist. then pull your cord through the hole(s) of your bead. make a 8-knot at each end of the cord.

37. now the top is done, let's work on the bottom. fold the edges of both points 1 cm to the inside of the fabric and pin it.
38. pin both points at it's place on the fluke (without pinning the monofin). do this at both side at once. the you hand-sew those edges. you can decorate them if you like by using a ribbon or sequences.


39. to put the tail on easy, sew the fluke on the inside to the side seams of the body and to the top of your split and your tail is done.


Geen opmerkingen:
Een reactie posten